Well here it goes, my AAR for the 1750 LW Tournament in Louisville!
It was my first time to Louisville and I had the joys of getting up at 4:30 am to make it on time (which I barely did). However, aside from not being able to see any of the wonderful Kentucky country-side, I did find my way to Pet Shop Comics.
I was amazed by the store! It's got 9000 square feet, half of which is dedicated to gaming! Aside the fact that the gaming space alone is over 4x my apartment size, it was fantastic to see a place where you could have an 18 man FOW tournament and still 3 other events going on at once!
Either way, I got there and quickly got through into the ringer. Here's my list:
American Rifles LW 1750
CiC, 2iC, and 2 bazookas
- Full Str Rifle Platoon
- Full Str Rifle Platoon
- Half Str Rifle Platoon (2 squads)
- Weapons Platoon with 3 M60 Mortars and 2 LMGs
- HMG Platoon with two HMGS
- Mortar Platoon with 4 M81 Mortars
- AT Gun Platoon with 3 57mm AT guns
- AT Gun Platoon with 3 57mm AT guns
- Full A & P Platoon with 2 bazookas
- AA Platoon with 2 M1 Bofors
- Full M10 TD Platoon
- Full Field Artillery Battery
- Full Field Artillery Battery
- L4 Grasshopper
I discovered after the tournament that the L4 has not been allowed yet in FE lists. I thought I had seen it in the PDF which contained the 155mm artillery options. Well, the L4 only made a big difference in my first game, but either way I apologize to Doug, Tony, and Scott for my use of an item that was not yet allowed. I guess the TO should have caught it, but the past is the past and no worries!
On to Round 1: Encounter vs. Doug's Fallschimagers

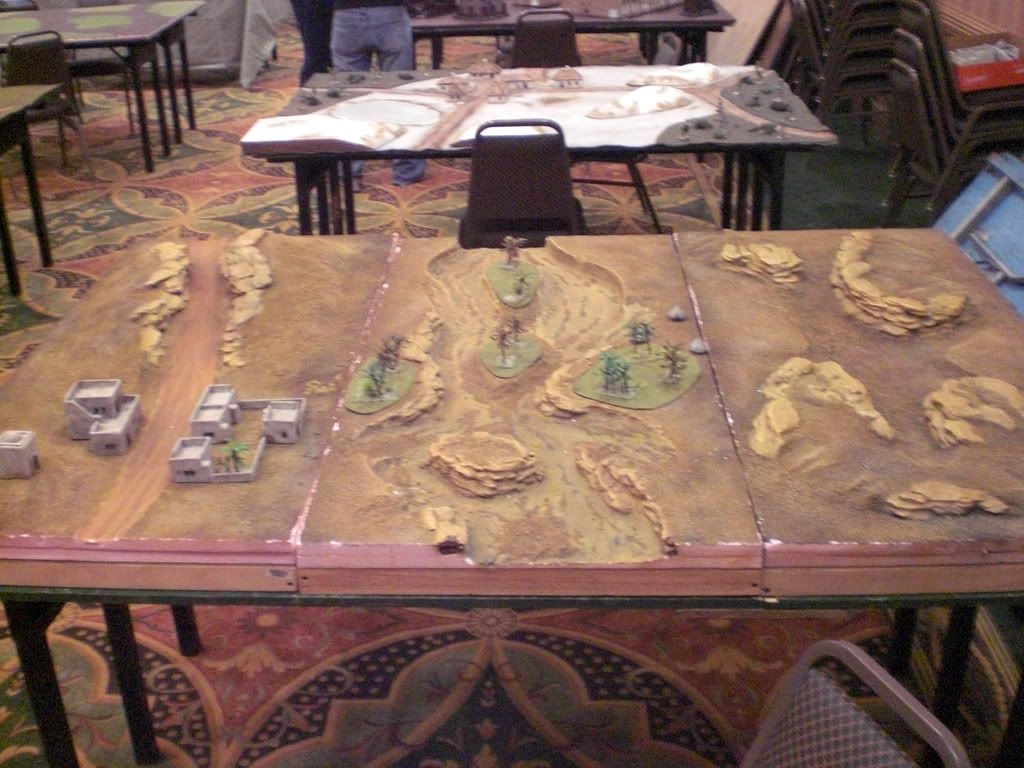
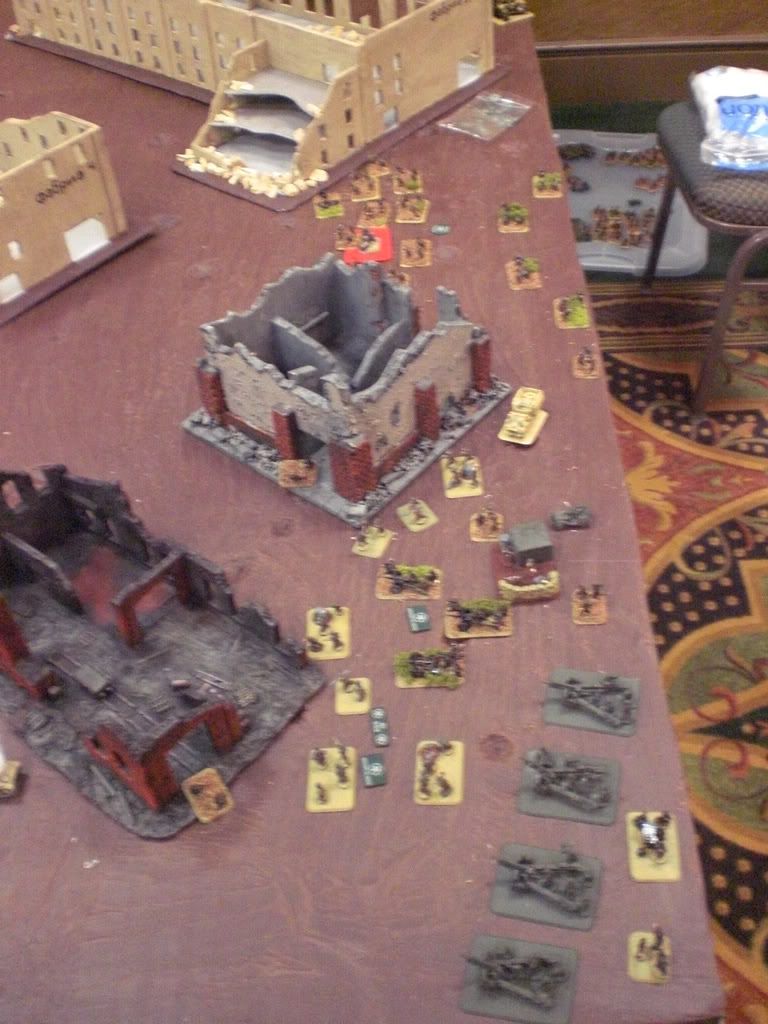
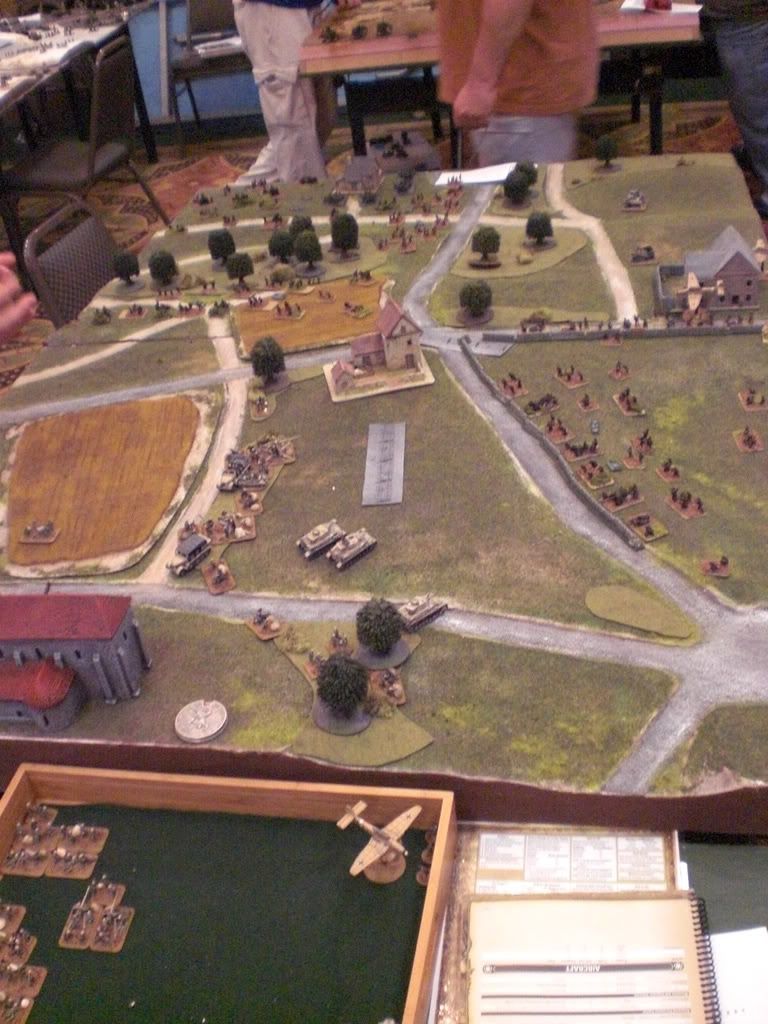
Round 1 I had the joy of playing Doug and his German paratroopers. We played on this lovely board which reminded me alot of Aix en Provence (French City in Southern France). Lots of buildings blocking all sorts of LOS with narrow streets inbetween. A couple of open fields dotted the long table edges but the middle was pretty much a city fight.
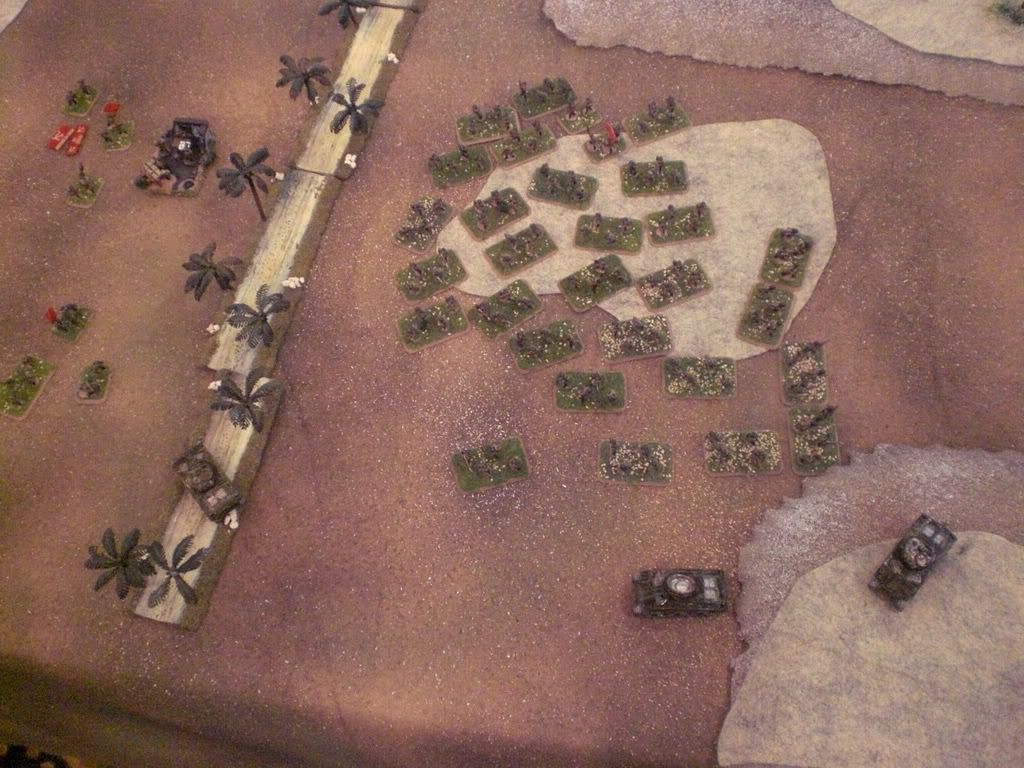
So awesome! A city fight with 2 infantry companies, this should be grand... With my massive 12 platoons I elected the closer table edge (from the picture) to place down my artillery platoons, mortars, AA, and 2 Rifle Platoons (1 full str and the 1 half-str). The full strength went on my right flank while my half str went on the left flank, both parked on objectives to start with. AA was in the middle with the mortars while the FABs were spread across the battlefield. My overall plan of attack was to push on the right flank with my big rifle platoon (CO attached) while the left one dug in and held off any attackers.
Doug's list had 7 platoons, with 2 FJ platoons, a pioneer platoon, 4 Stugs, some PAK 40s, some recoiless guns, and a small HMG platoon. He used that German special rule and made another infantry platoon. Oh, and some sporadic air support. He placed all four infantry platoons on the table, generally across the board, minus the far left side.
 Doug won the first turn and advanced his infantry up the middle and left side while his FJ platoon on the far right dug in. I followed suit by digging in my infantry on far obj while advancing my big rifle platoon up to the buildings. My artillery opened up on his bunched up infantry and managed to knock out a few stands, but mainly pinning all three of his mobile infantry platoons.
On his turn he failed to unpin one of his infantry platoons though the others scamble into the buildings to take cover from the artillery onslaught. His planes continue to arrive but fail to do anything.
Turn 2 and 3 went by with a big bang. I advanced with my large infantry platoon to assault his pinned platoon. I ranged in again on his platoons within the buildings and did some minimal damage. In the assault I was pretty positive I had him. But disaster struck! Out of a total of 11 rolls I made (needing a 4+) I failed 10 of them! He consequently killed 2 stands and I failed my morale plus the CiC reroll! It was quite an embarassing moment for the 1st platoon to be sure. Thankfully however he failed to unpin again (surprising being fearless) and I managed to strike in on turn 3 and wipe out the platoon. With the assault move it brought me into position to threaten the objective, so things were looking postitive for me at least!
 The next 2 turns were pretty much a stalemate. Neither one of us got any reserves in until turn 5 and with his infantry in the buildings or dug in and GTG I didn't stand a chance of ranging in any artillery to pin his FJs on the obj. Eventually our reserves starting rolling in and I was banking on having one of remaining infantry platoons arrive on the right side of the board to support the injured rifle platoon and help get the 5 hits needed to pin the FJ platoon.
Unfortunately this was not to be. After turn 5 both of our reserves were in and all of my infantry was on the other side of the board! His Stugs and recoiless guns arrived to support the FJ platoon on the obj while the other platoons were stuck on the other side in the stalemate. My TDs arrived on that side, but they don't have the weight of firepower needed to unlodge the FJs and instead went into a gun duel against the Stugs.
In the end I tried to make a mad push with 2 rifle platoons and the pioneers on the left flank to overwhelm his troops and go for a company command check but as I just couldn't come up with enough hits to pin his troops in the building I ran into trouble. I was finally able in the last turn to manuever out of the way of most of his fire and assault one of the infantry platoons in the building, dropping them to just the command stand who pulled off and passed his platoon check. With the breakthrough assault I was able to charge the HMG platoon (who got pinned earlier from the mortars) and destroy them though. The game ended as a draw 3-1.
Doug was a great opponent and we had a great time! I just couldn't get the hits neccessary to pull it off. What I really needed was a mobile support unit like some shermans or stuarts. My ATs didn't do anything and I think while I hoped my artillery would help pin him or even smoke him, I just couldn't get any artillery templates to drop (didn't range in once with 3 platoons of artillery for turns 4-6). Doug did quite well considering the situation and I felt pretty in control of the game at the beginning but couldn't bring it to bear by the end.
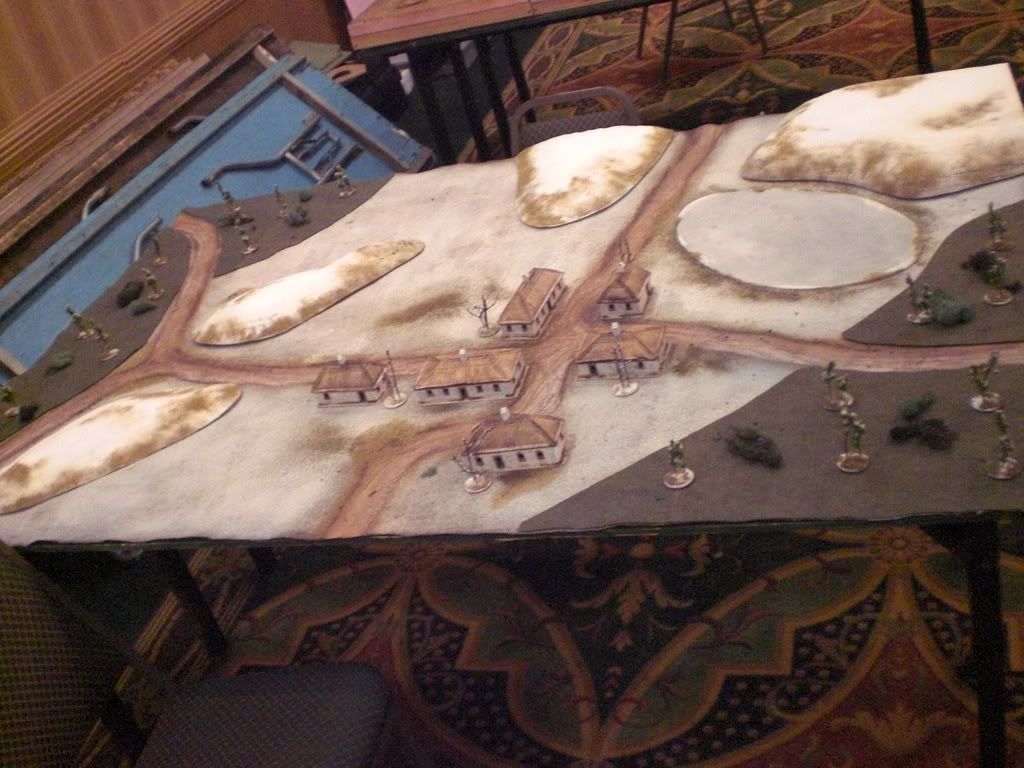
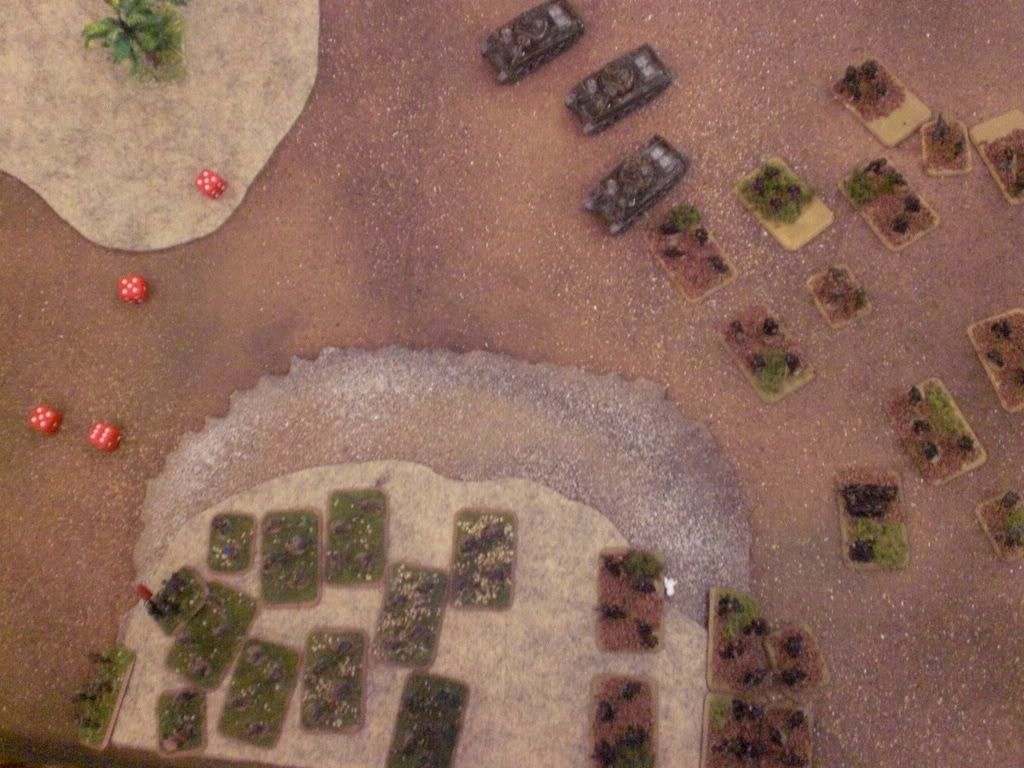
More pics of round 1:


Doug's aircraft were surprisingly annoying, taking an FAB down to half. I'm glad I brought AA otherwise it would have been worse.
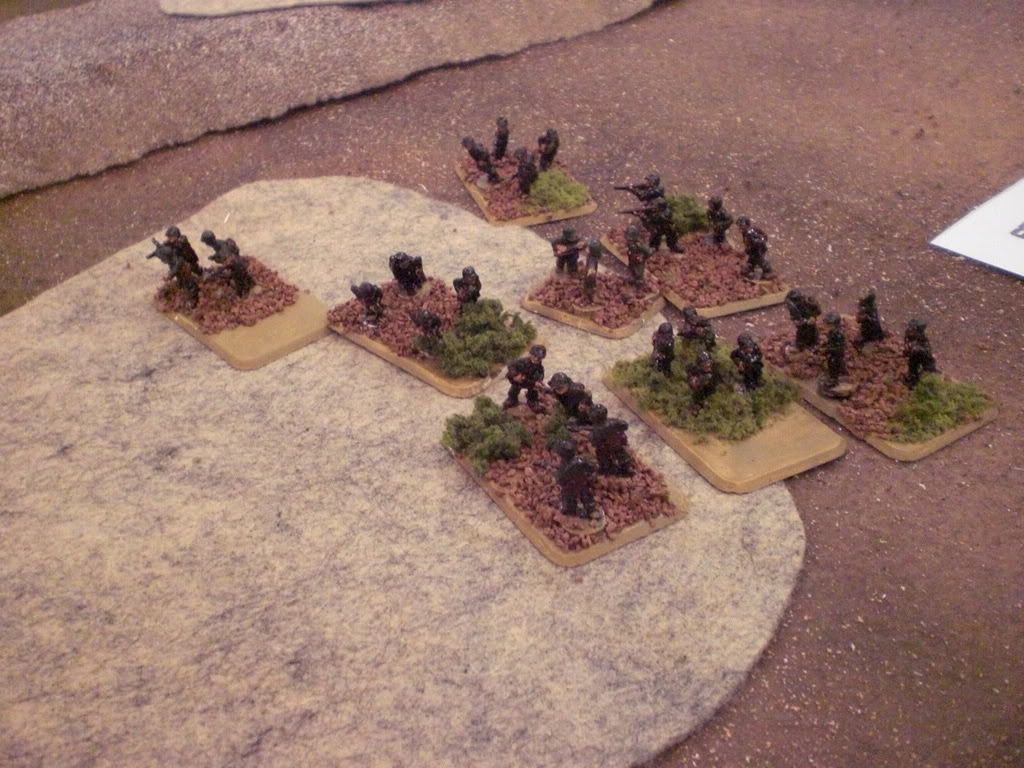
 The infantry platoon looking at the FJs and the objective. Unfortunately they were unable to claim what they worked so hard for.
So I went into round 2 knowing that I was on the bottom end of things. I was happy overall with how things yet, of course this was minus the fact that my dice rolling plagued me the second half of that game. But my tactics were pretty sound and I felt good about my army overall.
Round 2: Hold the Line against Tony's SS Tiger Company

While I thought it was ironic that I was playing Tony and his Tigers (they're grrrrrreat!) I did not like facing 5 loving kitties, whom are all fearless. He also had a scout squad and what seemed like a small panzergrenadier unit. Oh, did I mention that the CO happened to be Wittman? Awesome!
It was my first time to Louisville and I had the joys of getting up at 4:30 am to make it on time (which I barely did). However, aside from not being able to see any of the wonderful Kentucky country-side, I did find my way to Pet Shop Comics.
I was amazed by the store! It's got 9000 square feet, half of which is dedicated to gaming! Aside the fact that the gaming space alone is over 4x my apartment size, it was fantastic to see a place where you could have an 18 man FOW tournament and still 3 other events going on at once!
Either way, I got there and quickly got through into the ringer. Here's my list:
American Rifles LW 1750
CiC, 2iC, and 2 bazookas
- Full Str Rifle Platoon
- Full Str Rifle Platoon
- Half Str Rifle Platoon (2 squads)
- Weapons Platoon with 3 M60 Mortars and 2 LMGs
- HMG Platoon with two HMGS
- Mortar Platoon with 4 M81 Mortars
- AT Gun Platoon with 3 57mm AT guns
- AT Gun Platoon with 3 57mm AT guns
- Full A & P Platoon with 2 bazookas
- AA Platoon with 2 M1 Bofors
- Full M10 TD Platoon
- Full Field Artillery Battery
- Full Field Artillery Battery
- L4 Grasshopper
I discovered after the tournament that the L4 has not been allowed yet in FE lists. I thought I had seen it in the PDF which contained the 155mm artillery options. Well, the L4 only made a big difference in my first game, but either way I apologize to Doug, Tony, and Scott for my use of an item that was not yet allowed. I guess the TO should have caught it, but the past is the past and no worries!
On to Round 1: Encounter vs. Doug's Fallschimagers

Round 1 I had the joy of playing Doug and his German paratroopers. We played on this lovely board which reminded me alot of Aix en Provence (French City in Southern France). Lots of buildings blocking all sorts of LOS with narrow streets inbetween. A couple of open fields dotted the long table edges but the middle was pretty much a city fight.
So awesome! A city fight with 2 infantry companies, this should be grand... With my massive 12 platoons I elected the closer table edge (from the picture) to place down my artillery platoons, mortars, AA, and 2 Rifle Platoons (1 full str and the 1 half-str). The full strength went on my right flank while my half str went on the left flank, both parked on objectives to start with. AA was in the middle with the mortars while the FABs were spread across the battlefield. My overall plan of attack was to push on the right flank with my big rifle platoon (CO attached) while the left one dug in and held off any attackers.
Doug's list had 7 platoons, with 2 FJ platoons, a pioneer platoon, 4 Stugs, some PAK 40s, some recoiless guns, and a small HMG platoon. He used that German special rule and made another infantry platoon. Oh, and some sporadic air support. He placed all four infantry platoons on the table, generally across the board, minus the far left side.
 Doug won the first turn and advanced his infantry up the middle and left side while his FJ platoon on the far right dug in. I followed suit by digging in my infantry on far obj while advancing my big rifle platoon up to the buildings. My artillery opened up on his bunched up infantry and managed to knock out a few stands, but mainly pinning all three of his mobile infantry platoons.
On his turn he failed to unpin one of his infantry platoons though the others scamble into the buildings to take cover from the artillery onslaught. His planes continue to arrive but fail to do anything.
Turn 2 and 3 went by with a big bang. I advanced with my large infantry platoon to assault his pinned platoon. I ranged in again on his platoons within the buildings and did some minimal damage. In the assault I was pretty positive I had him. But disaster struck! Out of a total of 11 rolls I made (needing a 4+) I failed 10 of them! He consequently killed 2 stands and I failed my morale plus the CiC reroll! It was quite an embarassing moment for the 1st platoon to be sure. Thankfully however he failed to unpin again (surprising being fearless) and I managed to strike in on turn 3 and wipe out the platoon. With the assault move it brought me into position to threaten the objective, so things were looking postitive for me at least!
 The next 2 turns were pretty much a stalemate. Neither one of us got any reserves in until turn 5 and with his infantry in the buildings or dug in and GTG I didn't stand a chance of ranging in any artillery to pin his FJs on the obj. Eventually our reserves starting rolling in and I was banking on having one of remaining infantry platoons arrive on the right side of the board to support the injured rifle platoon and help get the 5 hits needed to pin the FJ platoon.
Unfortunately this was not to be. After turn 5 both of our reserves were in and all of my infantry was on the other side of the board! His Stugs and recoiless guns arrived to support the FJ platoon on the obj while the other platoons were stuck on the other side in the stalemate. My TDs arrived on that side, but they don't have the weight of firepower needed to unlodge the FJs and instead went into a gun duel against the Stugs.
In the end I tried to make a mad push with 2 rifle platoons and the pioneers on the left flank to overwhelm his troops and go for a company command check but as I just couldn't come up with enough hits to pin his troops in the building I ran into trouble. I was finally able in the last turn to manuever out of the way of most of his fire and assault one of the infantry platoons in the building, dropping them to just the command stand who pulled off and passed his platoon check. With the breakthrough assault I was able to charge the HMG platoon (who got pinned earlier from the mortars) and destroy them though. The game ended as a draw 3-1.
Doug was a great opponent and we had a great time! I just couldn't get the hits neccessary to pull it off. What I really needed was a mobile support unit like some shermans or stuarts. My ATs didn't do anything and I think while I hoped my artillery would help pin him or even smoke him, I just couldn't get any artillery templates to drop (didn't range in once with 3 platoons of artillery for turns 4-6). Doug did quite well considering the situation and I felt pretty in control of the game at the beginning but couldn't bring it to bear by the end.
More pics of round 1:


Doug's aircraft were surprisingly annoying, taking an FAB down to half. I'm glad I brought AA otherwise it would have been worse.
 The infantry platoon looking at the FJs and the objective. Unfortunately they were unable to claim what they worked so hard for.
So I went into round 2 knowing that I was on the bottom end of things. I was happy overall with how things yet, of course this was minus the fact that my dice rolling plagued me the second half of that game. But my tactics were pretty sound and I felt good about my army overall.
Round 2: Hold the Line against Tony's SS Tiger Company

While I thought it was ironic that I was playing Tony and his Tigers (they're grrrrrreat!) I did not like facing 5 loving kitties, whom are all fearless. He also had a scout squad and what seemed like a small panzergrenadier unit. Oh, did I mention that the CO happened to be Wittman? Awesome!
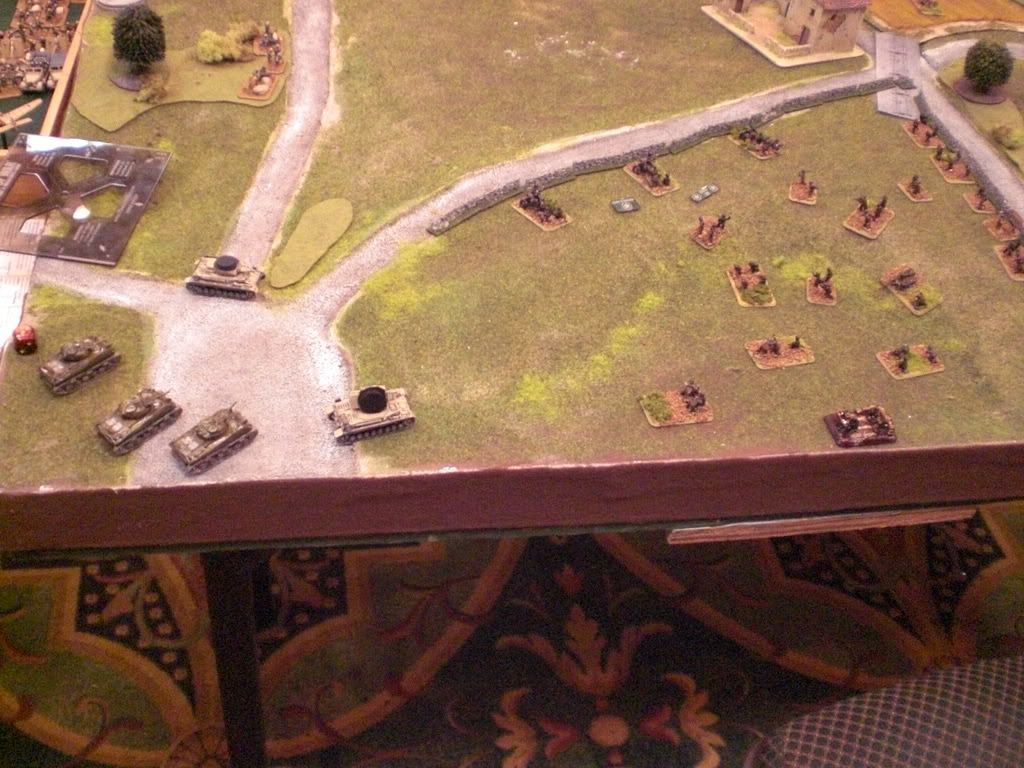
However, I was blessed with a very thick terrain board. This meant good things for me as I was defending and thus I place my pioneers in reserve, knowing that I would be able to grab that 4'' no defensive fire fun. I also put the TDs in reserve to have them pop out after he crossed into my lands, and an ATG unit, mainly for the halftracks. After much debate I placed both FABs on the table along with a big rifle platoon on the closer obj. My obj was placed farther back inside a building, so at least the kitties would have some trouble. Tony decided that all of those dug-in and GTG infantry weren't worth his time and stacked the other flank with the Tigers comming up the middle road and his halftracks along the opposite flank.
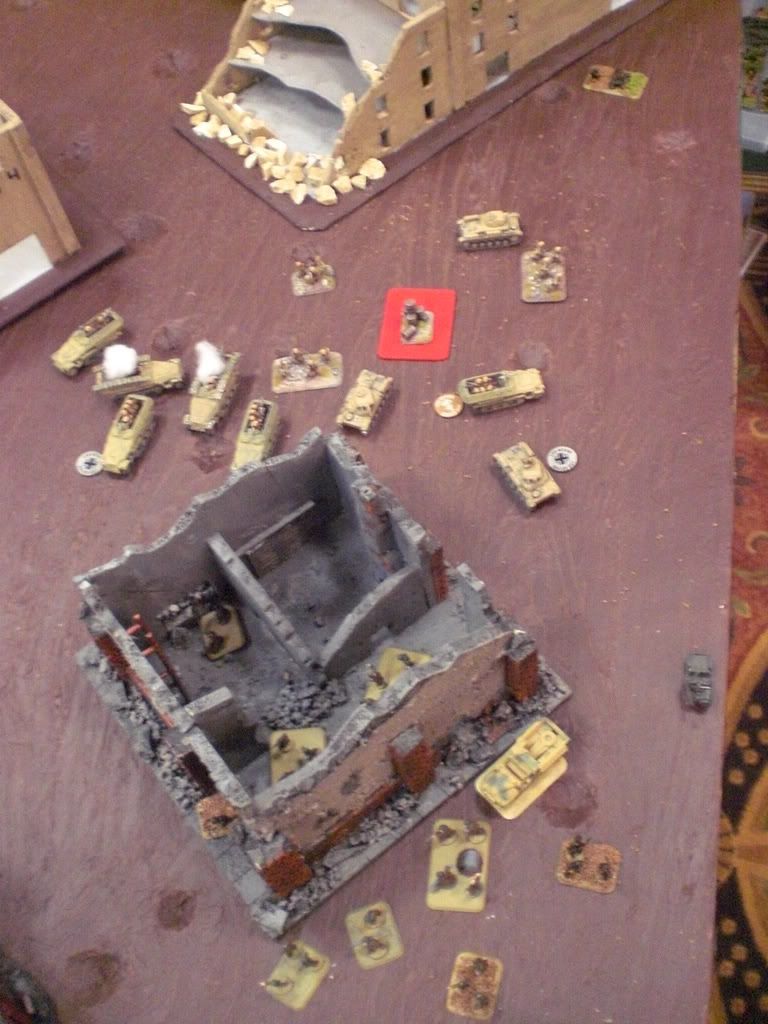
 First turn he definetly took me by surprise as he double timed all of his halftracks and then double timed his front Tiger platoon. My assumption is he was hoping to be crazy aggressive and try to catch my infantry platoon scrambling to cover the other obj. while I had few reinforcements on the table. However, this lead him open to lots of ambushing fire (we played on a 4x4 so some of his stuff was already past the halfway point). In my turn I revealed my pioneers (right next to the front tiger platoon) and my ATGs in the building facing off the two halftrack platoons...
Needless to say things quite well this first turn. My artillery TOTed on the rear Tiger platoon and bailed two of them, leaving only Wittman operational. My ATGs on the far side wreaked havoc, with 1 knocking out 2 of the panzergrendiers platoon and causing a check (which of course he passed) and the other two completely destroying the entire scout platoon! In assault my pioneers proved more then worth as they passed the 2 tank terror checks and bailed both of the Tigers, wiping out the platoon as well! I was in position to breakthrough assault the other tank platoon, and with only Wittman operational all I needed was to bail him out and the game would be over! However I failed my tank terror to charge in, and falled back into the safety of the buildings, cursing my eventual luck of failing a motivation check.

"Jimmy, I don't think those are shermans out there..."
So, with the first turn looking like it was almost a 7-0 game, I turned my attention to dealing with the major threat. 3 still active Tigers. Both Tigers remount and begin their assault upon my poor pioneers, who decide that it's time to fail every test they need, including saves and tank terror tests to stay in the fight of the assault. Tony's infantry moved into the building opposite the obj. and that was that. The next turn was a bit daunting as I was unable again to rally my pinned pioneers and moved them back into more buildings while I advanced my 2 rifle platoons (the second one arrived from reserves) on to prepare an assault on the Germans in the buildings. I revealed my TDs in hopes to nail some side armor shots but nothing came of short of a bailed tiger.
 Turn 4 was the end of it all. He shot at my ATGs and almost wiped them out (several nice 6s in there) and his shooting on my pioneers wiped out the platoon. I passed morale for my ATGs and brought my big rifle platoon into the buildings in an attempt to assault the Tigers in the same turn. My TDs failed to do anything again and because of this my infantry wasn't able to move in like I was hoping to close in the assault with the Tigers. However, positive things happened on the other end of the board. My artillery managed to range in on the infantry in the building, pinning them and paving the way for 3rd rifle platoon to assault and wipe them out. This lead to a morale check, which of course Tony promptly rolled a 1, ending the game 5-2 for me.
I went in a little worried, mainly due to the FV issue more so then the Tigers, but my TDs performed not nearly as well as I had hoped. That being said, I knew that eventually my infantry would be able to overwhelm them and even with those 3 Tigers rampaging around I knew that eventually I'd be able to catch a couple bailed out and get that assault in that I needed. Tony was a great opponent (he gave me time to eat!) and I would play against him or any of the other PSC guys again!
Couple more pics from Round 2:

My infantry after overrunning the Panzergrenadier platoon.
 The turn after the inital carnage of smoking Tigers. Unfortunatly Wittman and company were completely unphased by all of this.
Round 3: FFA vs. Scott's SS Panzer Company

So I'm in the middle of the pack going into the third round and I'm feeling relatively confident about things. My tactics have been sound and aside from issues I hadn't thought about in advance, I was pleased with my Americans. Of course now I go to a mission which I dread, Free For All. Whats worse of course, is that I'm on a crazy open table against more FV Tanks! I was getting really tired of Fearless Veterans at this point, and just wanted some good old confident! Either way, I needed to get my game face on!
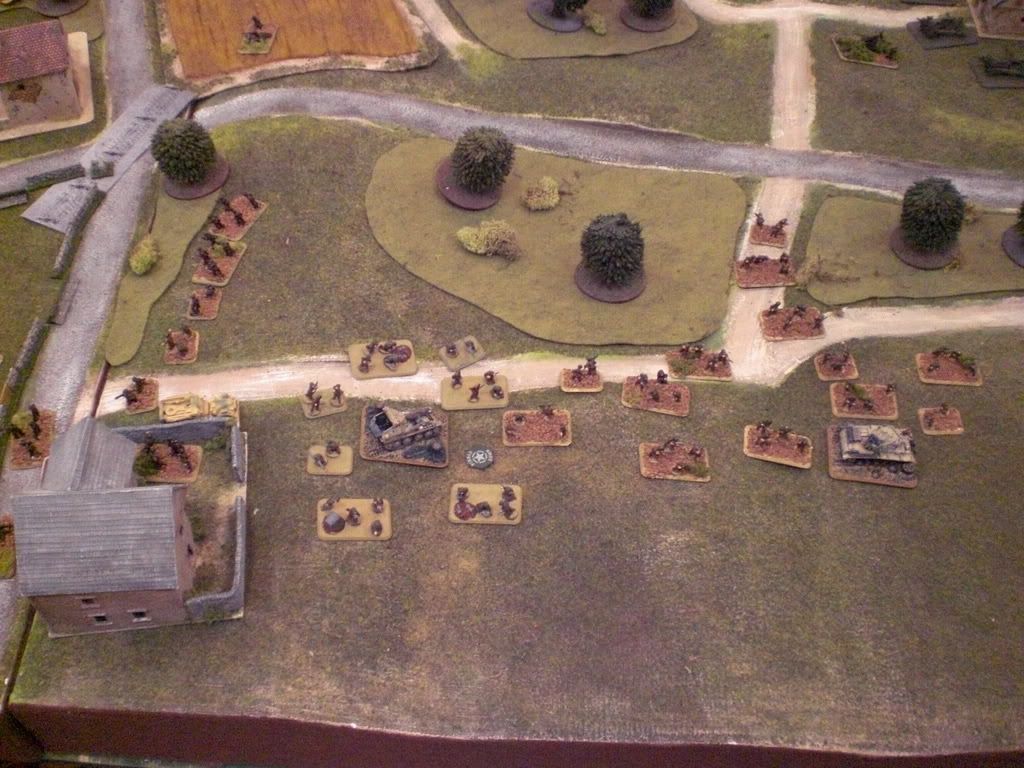
Scott told me that he was knew to the game, this may have been his 3rd or 4th game, I don't remember. Either way I knew this game wasn't going to go alot of turns as I assumed that there would be lots of explaining and decision making going on. His CO was a Panther and he had a Panther platoon, a Panzer IV platoon, a Panzergrenadier platoon, an FJ platoon, and an AA platoon. I more the tripled the number of stands on the board and decided that this would be worth putting to my advantage. Either way, I still planned to make my move and went with it accordingly. I placed my pioneers with some ATGs on the far flank obj. and then 1st rifle platoon with the other ATGs on the near obj. I stacked the near flank in efforts to push that side and overwhelm his FJ platoon. My artillery was spread out across the backside and my TDs were placed inbetween the 2 objs behind a wood.
 The first few turns were quite interesting as I pushed my way up the near flank with 2 rifle platoons and my CO while his panthers danced around in front of my pioneers and ATGs. He seemed a bit worried about the TDs and didn't want to assault my pioneers even though that was the near objective. Despite my best efforts of course by using smoke to force his Panthers to move around and have reduced ROF, he managed to knock out all of the ATGs with the pioneers. They of course failed their morale test but that left him to deal with the dug-in and GTG pioneers. This helped me alot as it took me way to long to get into assaulting range of the FJs.
Turns 3 and 4 went along the same sort of way, me holding off on deploying the TDs and him worrying about them too much to assault my pioneers. I finally got my infantry into position to assault and drove out the FJs from the building and the objective. I had planned on reassaulting the FJs and the lone Panzer IV, hoping to bring the others into the assault but my bombardment killed the remaining FJ stands! I assaulted the lone Panzer IV (which was bailed out) and captured it, but now I was in a tough pickle. I still had 2 Panzer IVs and the CO Panther hanging out on the obj which my 2 rifle platoons were hanging out on. I was in the woods so I had concealment but it just wasn't enough as I tried the best I could to at least bail 1 of the bloody tanks but between my bazookas, 2 FABs and everything else I threw at it I couldn't get a bail and the game ended in a draw. He was beginning to bring up his panzergrenadiers to assault the obj. held by the pioneers and his Panthers were progressively wittling them down, but things weren't looking good as I couldn't get my infantry to assault those damn tanks.
 I was frustrated though the game was a good one. My infantry just couldn't get it together to pull through, and my smoke was failing miserably. My initial plan was to smoke the Panther, moving my guys around to the far side of the Panzer IVs. I figured with only 2 tanks and maybe a possible bailing of another I would be able to accomplish my goal and assault the two of them. But alas, not enough time. I also need a mobile unit to be able to provide things like smoke or mobile AT. The ATGs did nothing but take damage and I think they are not gonna stay around too long.
Overall I had a great time and I learned where my weaknesses are really at, which are really in FFA and Encounter where it requires to be much more agressive, a difficult task for my army. I'm thinking that a platoon of stuarts might be a good addition to the group to make things worthwhile. The volume of MG fire would have helped in pinning those blasted FJs in the first round and they would have been able to bring the pressure on Scott's army as well, perhaps even knocked out a Panzer or two to make things a little easier for me.
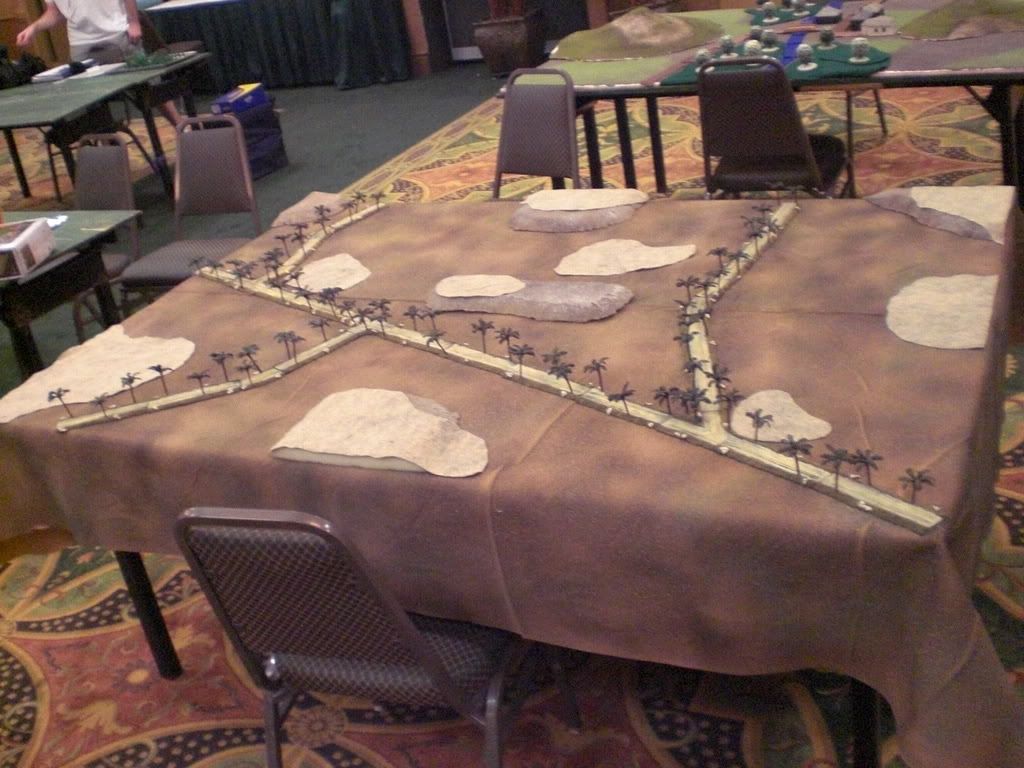
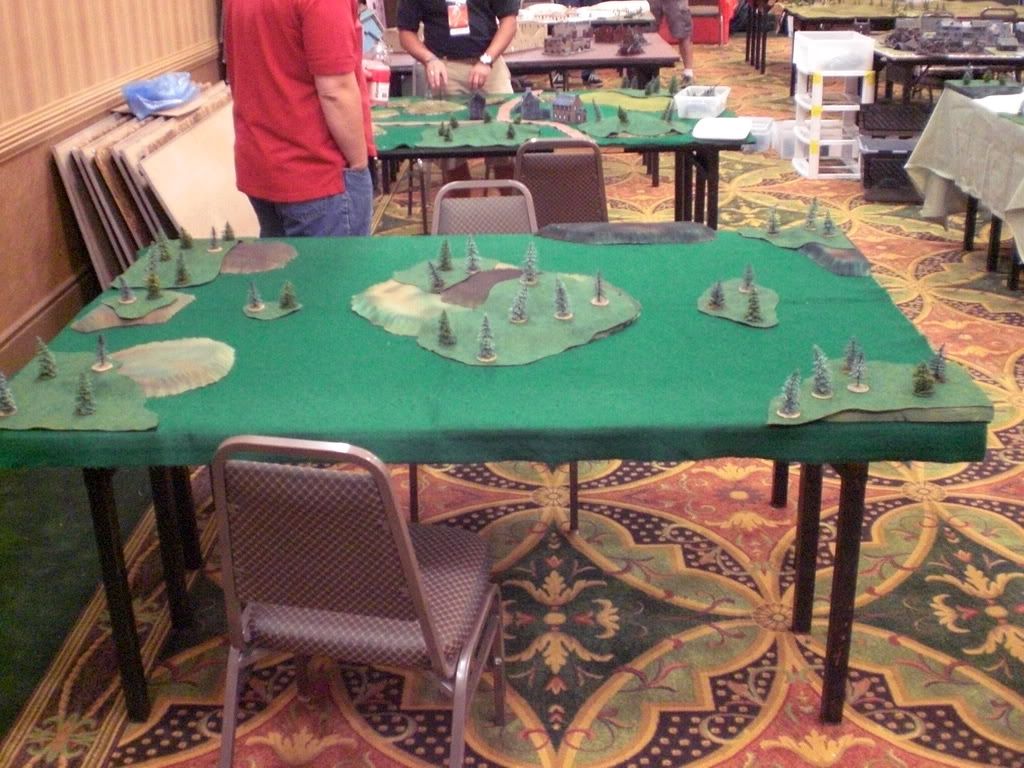
Either way I hope you enjoyed it! Here are a few more pics of armies and boards from Gamefest 2008! Thanks to Charles, Rick, and Jennie for hosting the event and running the tournaments and thanks again to my great opponents Doug, Tony, and Scott!


 Turn 4 was the end of it all. He shot at my ATGs and almost wiped them out (several nice 6s in there) and his shooting on my pioneers wiped out the platoon. I passed morale for my ATGs and brought my big rifle platoon into the buildings in an attempt to assault the Tigers in the same turn. My TDs failed to do anything again and because of this my infantry wasn't able to move in like I was hoping to close in the assault with the Tigers. However, positive things happened on the other end of the board. My artillery managed to range in on the infantry in the building, pinning them and paving the way for 3rd rifle platoon to assault and wipe them out. This lead to a morale check, which of course Tony promptly rolled a 1, ending the game 5-2 for me.
I went in a little worried, mainly due to the FV issue more so then the Tigers, but my TDs performed not nearly as well as I had hoped. That being said, I knew that eventually my infantry would be able to overwhelm them and even with those 3 Tigers rampaging around I knew that eventually I'd be able to catch a couple bailed out and get that assault in that I needed. Tony was a great opponent (he gave me time to eat!) and I would play against him or any of the other PSC guys again!
Couple more pics from Round 2:

My infantry after overrunning the Panzergrenadier platoon.
 The turn after the inital carnage of smoking Tigers. Unfortunatly Wittman and company were completely unphased by all of this.
Round 3: FFA vs. Scott's SS Panzer Company

So I'm in the middle of the pack going into the third round and I'm feeling relatively confident about things. My tactics have been sound and aside from issues I hadn't thought about in advance, I was pleased with my Americans. Of course now I go to a mission which I dread, Free For All. Whats worse of course, is that I'm on a crazy open table against more FV Tanks! I was getting really tired of Fearless Veterans at this point, and just wanted some good old confident! Either way, I needed to get my game face on!
Scott told me that he was knew to the game, this may have been his 3rd or 4th game, I don't remember. Either way I knew this game wasn't going to go alot of turns as I assumed that there would be lots of explaining and decision making going on. His CO was a Panther and he had a Panther platoon, a Panzer IV platoon, a Panzergrenadier platoon, an FJ platoon, and an AA platoon. I more the tripled the number of stands on the board and decided that this would be worth putting to my advantage. Either way, I still planned to make my move and went with it accordingly. I placed my pioneers with some ATGs on the far flank obj. and then 1st rifle platoon with the other ATGs on the near obj. I stacked the near flank in efforts to push that side and overwhelm his FJ platoon. My artillery was spread out across the backside and my TDs were placed inbetween the 2 objs behind a wood.
 The first few turns were quite interesting as I pushed my way up the near flank with 2 rifle platoons and my CO while his panthers danced around in front of my pioneers and ATGs. He seemed a bit worried about the TDs and didn't want to assault my pioneers even though that was the near objective. Despite my best efforts of course by using smoke to force his Panthers to move around and have reduced ROF, he managed to knock out all of the ATGs with the pioneers. They of course failed their morale test but that left him to deal with the dug-in and GTG pioneers. This helped me alot as it took me way to long to get into assaulting range of the FJs.
Turns 3 and 4 went along the same sort of way, me holding off on deploying the TDs and him worrying about them too much to assault my pioneers. I finally got my infantry into position to assault and drove out the FJs from the building and the objective. I had planned on reassaulting the FJs and the lone Panzer IV, hoping to bring the others into the assault but my bombardment killed the remaining FJ stands! I assaulted the lone Panzer IV (which was bailed out) and captured it, but now I was in a tough pickle. I still had 2 Panzer IVs and the CO Panther hanging out on the obj which my 2 rifle platoons were hanging out on. I was in the woods so I had concealment but it just wasn't enough as I tried the best I could to at least bail 1 of the bloody tanks but between my bazookas, 2 FABs and everything else I threw at it I couldn't get a bail and the game ended in a draw. He was beginning to bring up his panzergrenadiers to assault the obj. held by the pioneers and his Panthers were progressively wittling them down, but things weren't looking good as I couldn't get my infantry to assault those damn tanks.
 I was frustrated though the game was a good one. My infantry just couldn't get it together to pull through, and my smoke was failing miserably. My initial plan was to smoke the Panther, moving my guys around to the far side of the Panzer IVs. I figured with only 2 tanks and maybe a possible bailing of another I would be able to accomplish my goal and assault the two of them. But alas, not enough time. I also need a mobile unit to be able to provide things like smoke or mobile AT. The ATGs did nothing but take damage and I think they are not gonna stay around too long.
Overall I had a great time and I learned where my weaknesses are really at, which are really in FFA and Encounter where it requires to be much more agressive, a difficult task for my army. I'm thinking that a platoon of stuarts might be a good addition to the group to make things worthwhile. The volume of MG fire would have helped in pinning those blasted FJs in the first round and they would have been able to bring the pressure on Scott's army as well, perhaps even knocked out a Panzer or two to make things a little easier for me.
Either way I hope you enjoyed it! Here are a few more pics of armies and boards from Gamefest 2008! Thanks to Charles, Rick, and Jennie for hosting the event and running the tournaments and thanks again to my great opponents Doug, Tony, and Scott!


